Hey all!
It seems i had lost the key to my craftroom, but lucky for me, my mojo came back with reinforcement! So, get ready for a picture overload: yesterday i wanted to make something round and i made this...
Coucou tout le monde!
Il semble que j'avais perdu la clé de ma craftroom, mais heureusement pour moi, mon mojo est revenu avec des renforts! Donc préparez-vous a une surcharge d'images: hier j'avais envie de faire quelque chose de rond et j'ai fait ceci...
Ok, i know they sell these ready to use in stores. But what's the fun in that (besides the shopping)? lol
For the how to:
Ok, je sais que ça se vend prêt à l'emploi au magasin. Mais qu'est-ce qu'il y a de drôle à ça (à part le shopping)? lol
Pour le pas à pas:
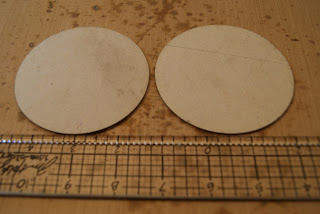
I started with two round 1/16 inch cardboard disks.
J'ai démarré avec deux disques en carton 2 mm.
I cut off a peace on one of them.
J'ai coupé un morceau sur un des disques.
I cut out the shapes for the base.
J'ai découpé les formes pour la base.
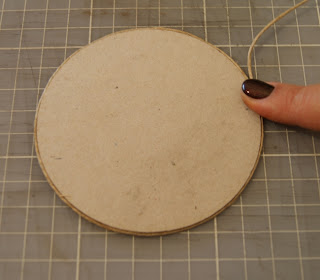
To know how big my cardboard had to be, i used a peace of rope to measure my disk.
(i'm a zero in geomatry, lol)
Pour savoir de quelle taille devait être mon carton, j'ai utilisé un morceau de ficelle pour mesurer.
(je suis nulle en géométrie, lol)
After cutting out my cardboard (height = 4 3/4), i marked it every 3/4 inch on the whole lenght. I made cuts following those lines but watching not to go all the way through!
Après avoir coupé mon carton (hauteur = 12 cm), j'ai tracé des lignes tous les 19mm sur toute la longueur. J'ai fait des coupures suivant ces lignes en faisant attention de ne pas couper jusqu'au bout!
This way the cardboard can be rounded without ripping.
De cette façon le carton peut être arrondi sans se déchirer.
I taped the two end together using masking tape..
J'ai collé les deux extrémités ensemble avec du masking tape.
I pushed the bottom trough the tube to place it correctly.
J'ai poussé le fond à travers le tube pour le placer correctement.
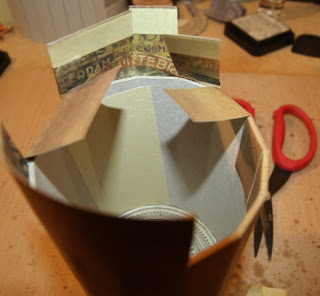
I put tape on the whole tube cutting it longer so that the ends came over the bottom. I made cuts in the tape following the edges of the cardboard of the tube so i could bend it down on the bottom.
J'ai mis du tape sur tout le tube en le laissant dépasser du fond. J'ai fait des entailles dans le tape en suivant les arêtes du carton du tube afin de pouvoir le replier sur le fond.
I stamped some paper from Lord Tim of Holtz paperstash 'Lose and found' using his stamps with coffee archival ink. But first i marked the paper with folds to know what would be on the tube.
J'ai tamponné du papier de Seigneur Tim of Holtz de son bloc 'Lost and found' employant ses tampons avec de l'encre archival coffee. Mais j'ai d'abord marqué le papier avec des plis pour savoir quelle partie serait sur le tube.
I taped the paper to the tube using lots and lots of dubbel sided tape, following the folds i made
J'ai collé le papier sur le tube en utilisant des masses de double face, en suivant les plis que j'avais fait.
At the top and bottom i made cuts in the paper and fold it down.
Sur le dessus et le fond, j'ai fait des entailles dans le papier puis je l'ai replié.
For the two smaller storages i taped the bottom and made cuts.
Pour les deux petits rangements j'ai mis du tape sur le fond et j'ai fait des entailles.
I prepared my cardboard in the same way as for the tube and placed it on the tape allongside the bottom. Than i folded the tape.
J'ai préparé mon carton de la même manière que pour le tube et je l'ai placé sur le tape le long du fond. Puis j'ai replié le tape.
I covered it in paper the same way i covered the tube. I placed kraft inside the 3 pieces.
Je l'ai recouvert de papier de la même manière que pour le tube. J'ai placé du kraft à l'intérieure des 3 morceaux.
Everything sticks together thanks to a piece of cardboard on the bottom and some multi medium at the edges of the smaller storages.
Tout colle ensemble grâce à un bout de carton sur le fond et un peu de multi medium sur les bords des petits compartiments.
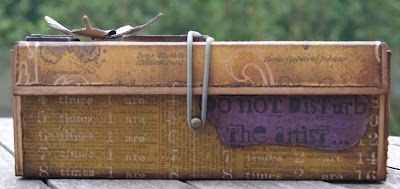
Than it's the even more fun part: decorating! I kept it simple with just some Lady Wendy Vecchi art parts and stamps, a bit of clearly for art on the art part flower and a Lord Tim tissue flower.
The same cardboard technique can be used for the lids of treasure boxes. I think i might give that one a try too! See you soon and meanwhile i'm wishing you all lots of creative moments!
Ensuite commence la partie encore plus amusante: la déco! J'ai fait du simple avec juste quelques art parts et tampons de Lady Wendy Vecchi, un peu de clearly for art sur la fleur en art part et une fleur en tissue de Seigneur Tim.
La même technique de cartonnage peut être utilisée pour faire le couvercle de boîtes à trésor. Je crois d'ailleurs que je vais tenter ça aussi! A bientôt et entre-temps je vous souhaite tous pleins de moments créatifs!


